Monday, October 26, 2015

Halloween Card +Sharpie background technique

Today I have another Clean and simple Halloween card that has a couple fun techniques and a super easy background.

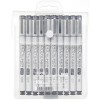
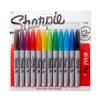
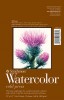
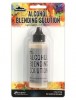
To start off I took a piece of watercolor card stock and a regular orange colored sharpie, I colored the whole piece with the sharpie making to get a pretty good saturation. Next I took my Ranger alcohol blending solution and made small drops all over the card stock. Since the sharpie is alcohol based it reacts with the solution and moves it around giving this awesome muddled spotty look. I really love how it came out and I'm definitely gonna do it with other colors lol


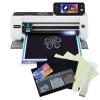
For my sentiment the word Halloween is a pre-installed word that comes on the 
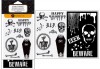
Scan N Cut 2 but you could use any big bold stamp or diecut letters anything would work. I cut it at 4.5in from watercolor card stock and painted it black, then covered it with a couple coats of black Wink of Stella for subtle shimmer, stamped the happy from the Hampton Art Beware set in versafine and clear embossed it.


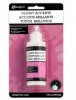
To fill in the empty space at the top of the card I freehand drew some simple spider webs and a dangling spider. To give it some dimension I took my glossy accents and put it on the spiders body. I added a few enamel dots, as most of my cards have and there we go a simple (pretty much) one layered card with a fun sharpie technique.

Happy Halloween!!!!


Friday, October 23, 2015

Simple Halloween Card

Today's card is another Halloween card but a little more clean and simple. Like I said in my last post I don't normally make Halloween cards but something this year has just compelled me to make some, and I'm really enjoying it!


To start off this card I decided to make my own background using some black tube watercolor paint. I went with tubed paint because it gives a nice solid opaque coverage that other watercolors can't. I took a piece of water color paper and painted this fun geometric pattern on it and attached it with some foam tape to my card base...It didn't take too long only about 15 mins, even though there are a lot of lines lol. This pattern is super easy to paint and anybody can do it.


Next I took a pumpkin from the Hero Arts stamp set Thankful For You. I started by stamping the pumpkin in Versafine and clear embossing over it. I took Distress ink in the colors, Spiced Marmalade, Dried Marigold, Ripe Persimmon, Wild Honey, Rusty Hinge and Mowed Lawn and painted in the pumpkin. I then die cut a piece of vellum using the LawnFawn stitched circles dies to put under the pumpkin and then popped it up on some foam tape, it helps separate the pumpkin from the busy geometric background. I made the sentiment using my Dymo label maker and attached it as well as some enamel dots and gems to the card. 

I really love how this card turned out, it's clean and simple and has a great focal point of the bright orange pumpkin.

Happy Halloween!!!!