Saturday, November 18, 2017

White Textured backgrounds Ft.New SSS/CZ Design products

For today's card I'm focusing on a white backgrounds with texture...and some new CZ Design products for Simon Says Stamp. I just love the look of the colorful sentiment on a white background they pop beautifully! and work amazing with these new products!

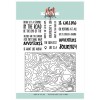
For the first card started with a white card base and some additional strips of  the same white card stock and of mesh origami paper...one of my favorite things to use on cards its adds such amazing texture. I then water colored rainbow colors with Dr. Ph. Martin's liquid watercolor and die cut "Happy" out of that piece. I added some spectrum noir clear glitter pen over then letters and glued them to my background panel.


I then white heat embossed birthday to you on a strip of black card stock and adhered it below Happy. I then added some enamel dot/nuovo drops to finish the card.


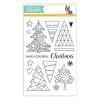
For the Second card I started by embossing a white panel with the We R Memory keepers Geometric embossing folder, and spritzed it with some Heidi swapp color shine spray in white (It's hard to tell in the pictures but it has an great sheen in person).I attached the panel on some craft foam to my gray card base.


 For the sentiments I painted some greens, blues, and teals on to some Canson water color paper and then stamped, white heat embossed and die cut HAPPY from the SSS & Cz Design Birthday Palooza stamp set. I also cut a thin strip from it as well. I white heat embossed the rest of the sentiment on a small piece of gray card stock that coordinated with the card base.


I popped both sentiments on some craft foam and adhered them to the card. I attached the thin piece of water colored paper to the edge of the panel and added some enamel dots to finish the card!


Wednesday, October 25, 2017

Background Shift Card


To start off today's card I took a piece of water color card stock and painted on distress ink in the colors Worn Lipstick, Picked Raspberry, Tumbled Glass, Salty Ocean, Squeezed lemonade and a little Wild Honey. I then took my distress spray bottle and spritzed on water droplets. I took a circle die and cut out the center of the background, attached the card base and Then rotated the circle and adhered it on some foam tape back where it was cut from.


 For the sentiment I die cut the word holla from a piece of white and black card stock adhered the white on top of the black and shifting it slightly to the right for a shadow effect . I white heat embossed it's your birthday from Neat & Tangled on a strip of black card stock and cut some banner ends. I added some wink of Stella glitter onto the holla and adhered both of them on top of the circle.


 To break up the background a little more I took two thin strips left over from trimming the background and attached them down the middle of the card I also added a black dashed line around the circle for some more contrast. and of course added some Darice clear iridescent sequins to finish the card.

Friday, October 20, 2017

Halloween cards!!

I normally don't make Halloween cards but I've had these couple idea for a while and just needed to make them. What inspired me was Abstract background stamp from My Favorite Things. I took a look at it and thought it kind a looks like spiderwebs. and would make an awesome Halloween card. Second was to make a bigger version on the  a drippy goo  punch from Martha Stewart with neon green colors, it just screams Halloween!


To start the first card I clear embossed a small piece of black card stock with the background stamp. I then took my card base and blended wilted Violet distress ink on the edges and splattered some water droplets on it as well. For the greeting I water colored with twisted citron and Carved pumpkin distress ink, cut out "Halloween" with the Emmitt alphabet die set from my favorite things and white embossed "happy" from lawn fawn on a thin strip of the orange.


 I then covered the black piece with some spectrum noir clear glitter pen for some sparkle (it's hard to tell in pictures lol). I assembled the card by putting the background on a slant as well as the sentiments, and added some sequins to finish the card off.


For the second card I started by ink blending twisted citron and mowed lawn distress inks on to some Bristol about 3/4 down form the top and splattered some watered on it for a more muddled effect. I then took a Copic multi liner and sketched out my slime drips, varying the heights and sizes. I then filled in the background area with a black Copic marker to really make the green pop!


To really enhance the slimey goo effect I covered all the green with glossy accents and let it dry overnight. The next day white heat embossed Happy Halloween form the Simon Says Stamp Autumn Greeting stamp set. As I was embossing I was making sure to move the heat around quickly as to not mess up the glossy accents but thought maybe it would do something cool if I let it stay on a spot for a while, I had made a test sheet before making the actual card and tested it on there and it created some really cool little bubbles so I had to do it on the card as well.
to finish the card i of course had to add some sequins!


Friday, March 3, 2017

Rainbow Topography Background

Update: It has been quit a while since I've posted here sad to say over a year. Life sometimes gets in the way of your hobbies, but I'm back and ready to start posting way more often and hopefully expand my followers!

For today's card I'm basing it off of my new favorite background stamp from Neat & Tangled's Topography stamp set. This is such a versatile stamp with endless possibilities for color combinations and patterns.


For my first of many cards I will be making with this set, I had to paint a rainbow background. I used the Gansai Tambi Watercolors to paint the background. These watercolors are a great set since they have so many different shades of each color it makes for an easy transition between each one. To make the background pop a bit more I went over a few of the lines with a Spectrum Noir glitter brush marker for some shine.


For the sentiment I stamped the "Have a colorful" from the Simon Says Stamp Christmas set Color Me Trees and white heat embossed it on a small strip of black card stock and die cut the birthday from My Favorite Things Cause for celebration die set from the same black card stock, stacked a few of them and went over it with my black glitter Wink of Stella. To off set the die cut from the background a little more I adhered it on a Vellum banner to make it a little easier on the eye.


To finish off the card i added some Pretty Pink Posh clear drops and adhered it all to a white card base. I just love the Geometric style of this stamp and i know it'll be well used for many cards!!